As I’ve noted previously, the latter part of 2014 brought us a veritable arms race of high power regulated box mods. 2015 promises to be the year of temperature control regulated devices. The Pioneer4You IPV4, subject of this review, brings both characteristics to bear. Since the advent of temperature protection, courtesy of Evolv in the form of the DNA40 board, quite a few other contenders have emerged in attempts to claim the temperature control crown. The only serious contender to date, however, is Yihi. The Chinese chip (and now mod) manufacturer got things rolling with the excellent SX350J board. Their follow up effort, while not as full featured, is equally capable – I’m referring, of course, to the SX330 V4S board found in the IPV4.
So, big power, dual battery fog maker and sophisticated temperature control device? Too good to be true? Read on and find out, friends.
The Pioneer4You IPV4 used for this review was provided by Vaporizer Chief .
[box type=”shadow” align=”aligncenter” width=”600″ ]
Where to buy the Pioneer4You IPV4:
- Buy for $71.95 (coupon code: 10off) – Same version reviewed, Ships from USA.
[/box]
The Packaging and Included Stuff
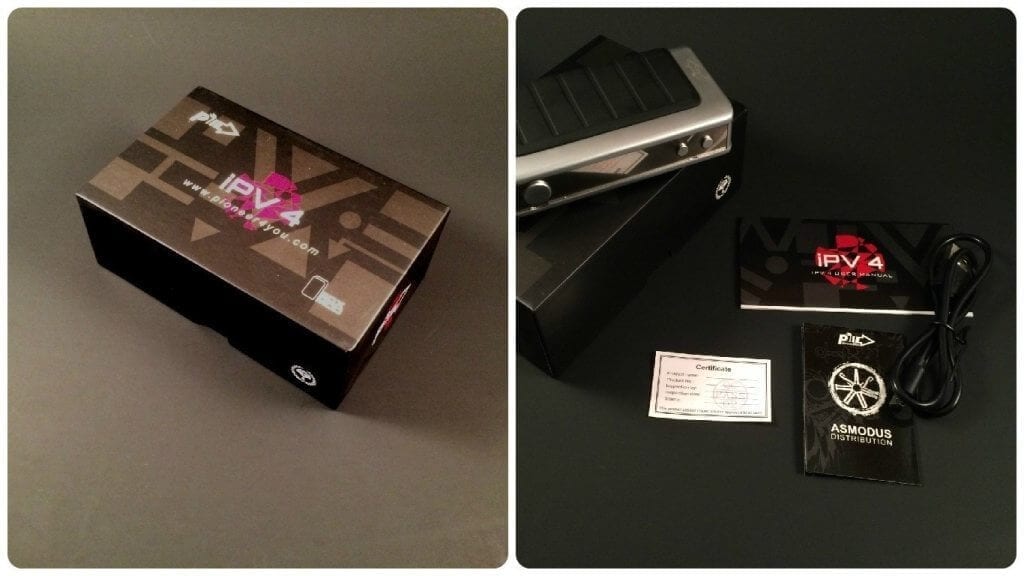
The IPV4 arrives in a nice gift box and includes the device itself, user manual, Asmodus warranty card, quality control certificate, and a USB data cable. It is worth mentioning the user manual included with my unit does not document the temperature control functions. I would imagine units currently shipping will include an updated user manual. The IPV4 was originally going to ship without the temperature control features enabled requiring the end user to perform a firmware update to enable them. However, I believe all the units shipped, even the first batch, had temperature control enabled out of the box.
The IPV4 carries a one year warranty which is serviced by Asmodus for United States customers.
Pioneer4You IPV4 Specifications:
- Output power: 10W-100W
- Output voltage: 1.0V-7.0V
- Atomizer resistances supported (power mode): 0.1Ω-3.0Ω
- Atomizer resistances supported (joules mode): 0.05Ω-0.10Ω recommended
- Battery voltage operating range: 6.4V-8.4V
Features
- Spring loaded 510 connector
- Ball bearing battery cover
- OLED screen
- Aluminum construction
- Temperature control
- Five memory presets
- Dual 18650 batteries
- Low voltage protection
- Over voltage protection
- Reverse polarity protection
- Short circuit protection
- User upgradeable firmware
Build Quality
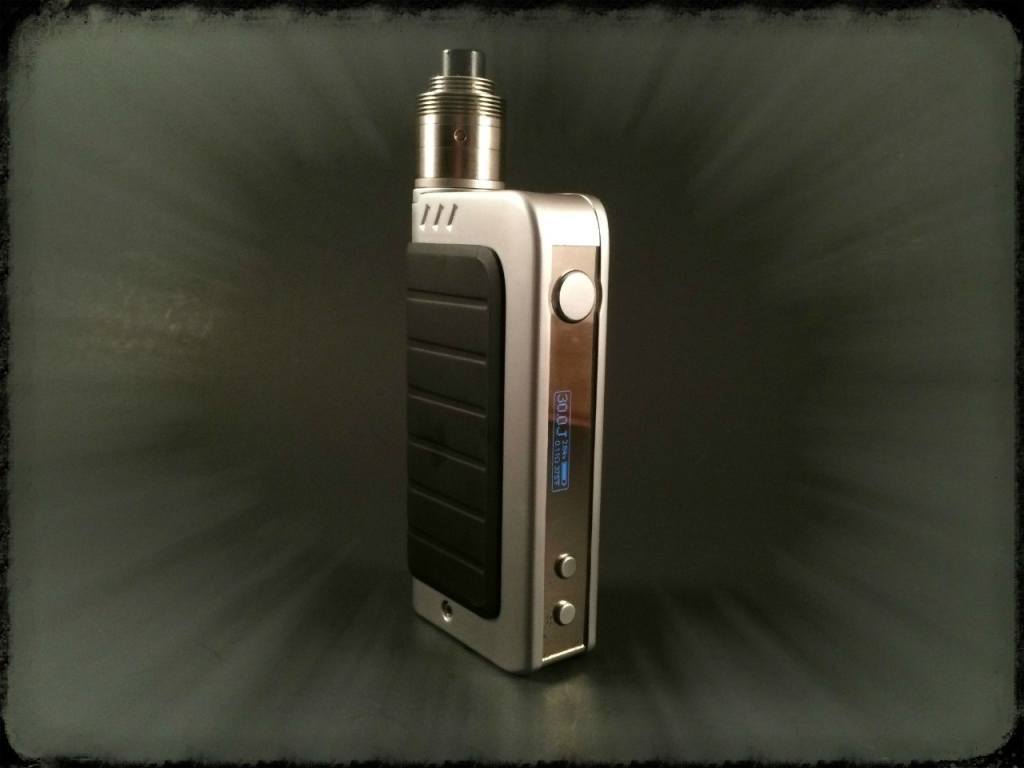
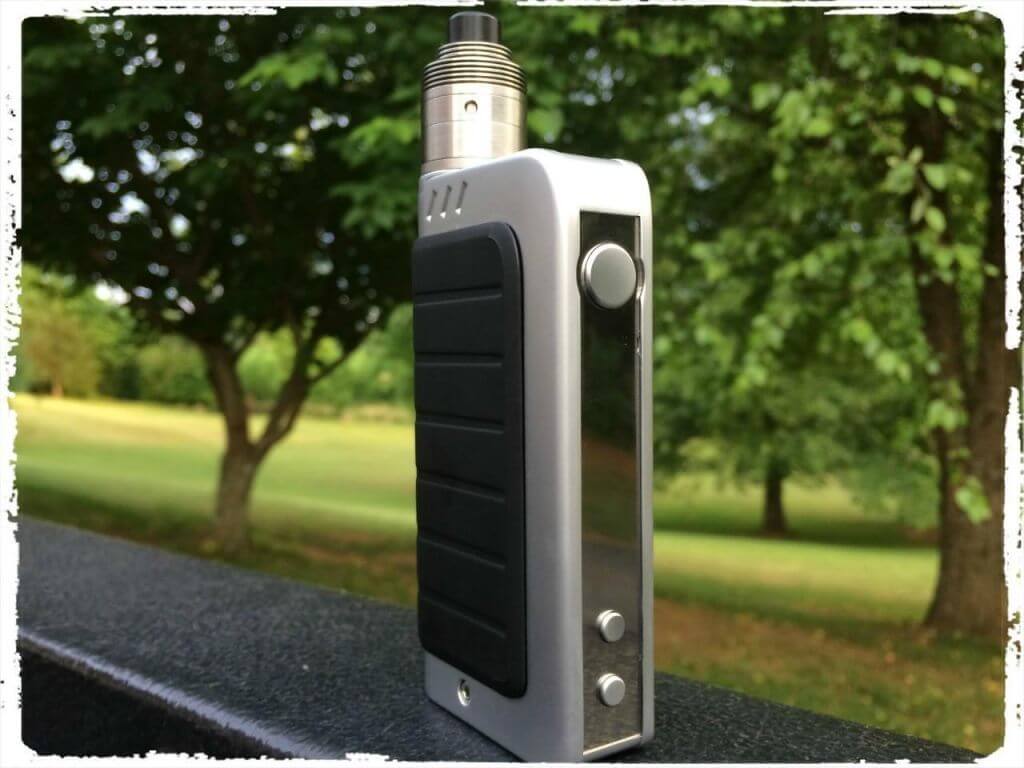
The IPV4, which I think looks a bit cheaply made, is rather well put together. The device is surprisingly solid and feels substantial in hand. The silver finish on the review unit is cleanly applied and no defects are present. The battery cover has a very nice soft touch feel, making the IPV4 pleasant to hold and use. The rounded rear of the device makes for very comfortable handling unlike some of the squared-off, uber-boxy dual battery mods. I’m looking at you Sigelei. A very unobtrusive Pioneer4You logo is printed near the bottom on one side of the device. The less gaudy branding, the better, in my opinion. As always, aesthetics are subjective. While I think the device looks “cheap”, it is certainly more attractive than the conventional monolithic looking square box mods.
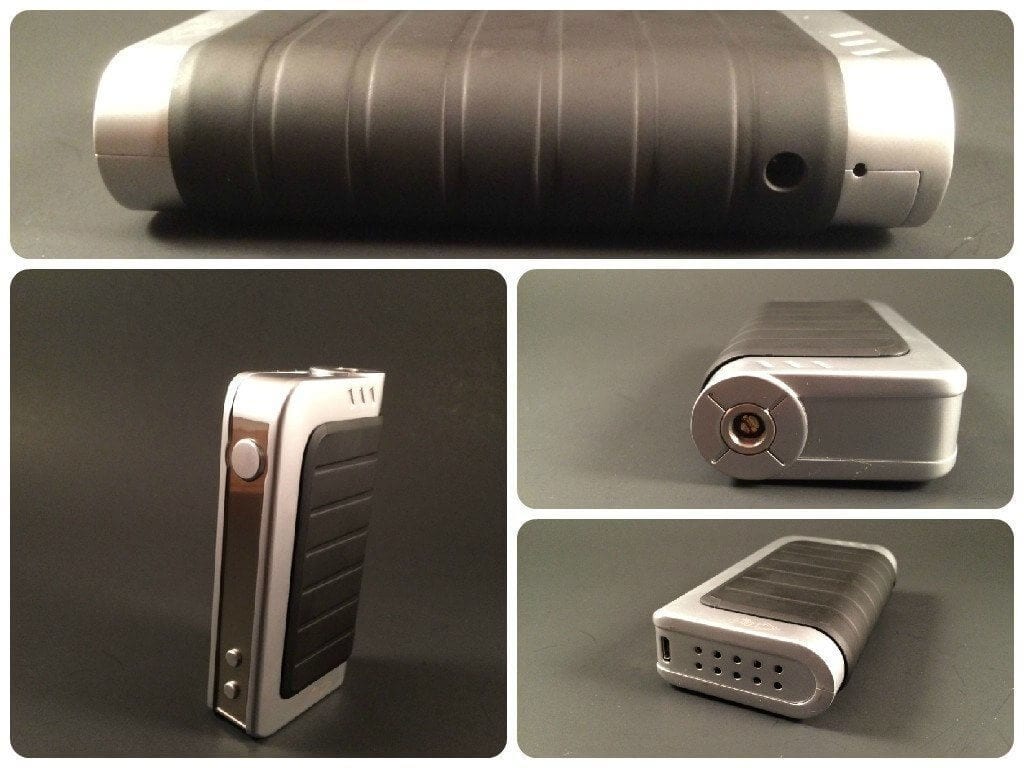
Going around the IPV4, you’ll find the OLED screen, firing button, up/down buttons, a micro USB port, bottom venting holes, a spring loaded 510 connector, and a 9V charging port (more on that later). The OLED screen panel has a mirror finish which many users have complained about. The mirror finish renders the display difficult to read in brightly lit environments. However, P4Y has recently changed to a black panel – the newest versions will have the black panel rather than the mirrored panel. Other than being a finger print magnet, I don’t really have a problem with the mirrored finish.
The firing button has a bit of a “squishy” feel while the up/down buttons have a pronounced tactile click. All three buttons are well secured and there is not even a hint of button rattle.
You’ll notice the spring loaded 510 pin has a slotted head – do not attempt to adjust the pin, you’ll potentially turn your device into a paperweight. Why manufactures insist on using slotted heads for spring loaded pins is beyond me. The atomizers I use with the IPV4 all sit flush.
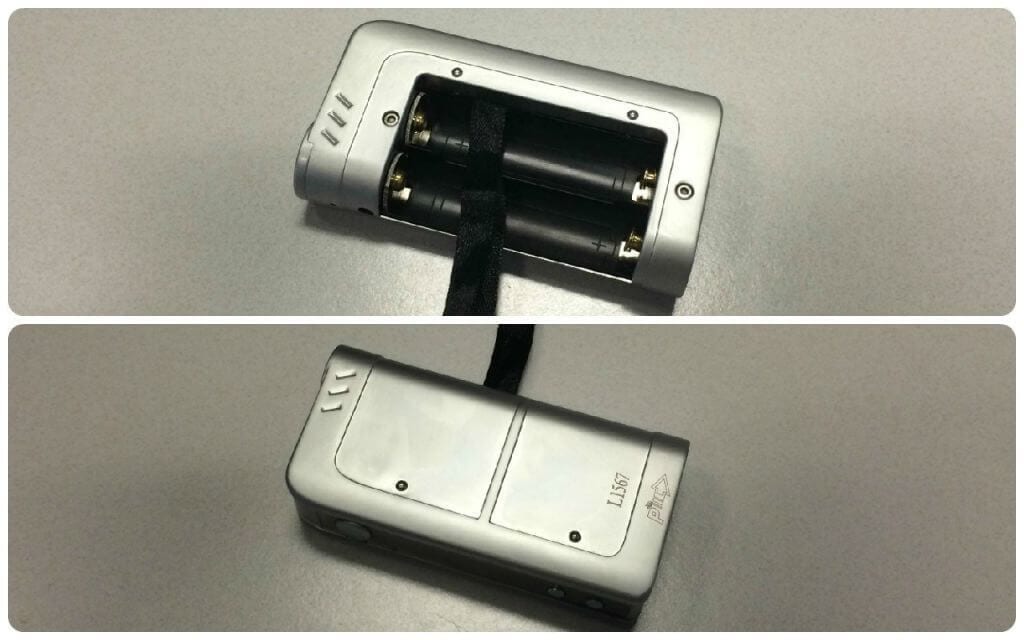
The battery cover of the IPV4 snaps on and off easily but is very secure. The cover is retained by small ball bearings and is light years more convenient than the ridiculous screw on battery door of its older sibling, the IPV3. The internals are tidy, as is the case with most recent iterations of box mods coming from China. The battery sled features polarity markings to properly orient your batteries (outside battery positive down, inside battery positive up), a battery ribbon, and spring loaded bottom battery contacts. The guts are nicely put together. On the reverse side of the device under the battery cover you will find a production lot number and couple of more ball bearings which secure the battery cover.
Let’s circle back to that 9V charging port. The micro USB port on the IPV4 exists solely for software upgrades, shall any be issued. The IPV4 does have built in charging circuitry which purportedly features balance charging, which is crucial to charging dual batteries in series. If you choose to charge the batteries in the device, Yihi recommends a 9V 2A charger. Me? I’ll pull my batteries and throw them in my external charger.
The Pioneer4You is nicely constructed which belies it’s kind of stamped aluminum budget appearance. And, it is only fair to note, this is a comparatively inexpensive device. I think P4Y hit the perfect balance between build quality and price.
Usage and Performance
Since this device operates as a conventional variable wattage mod for use with Kanthal wire and a temperature control device for use with Ni200 (nickel) wire, I’ll do my best to cover the performance of both modes. But, first, let’s touch on some operational aspects.
Five clicks of the firing button will power on the device and you will be greeted with a P4Y logo and then ‘IPV4’ before the device boots to a darkened screen. Five more clicks of the firing button will bring up the settings menu. Each subsequent press of the firing button will cycle through the available options. Your options will vary depending on which mode the device is in.
In Power mode, you’ll have options to turn the device off, change to joules mode, or exit the menu. In Joules mode the additional settings of desired temperature and temperature units (Fahrenheit or Celsius) are available. Temperature is changed by pressing the up or down buttons to reach the desired temperature (in one degree increments) – press the firing button to set the temperature and return to the menu. You can toggle between Fahrenheit and Celsius or Power mode and Joules mode by using either the up or down buttons and pressing the firing button once to lock in your setting and return to the menu. Powering the device off or exiting the menu are executed by pressing either the up or down button once when the appropriate option is displayed on the menu.
The menu navigation is simple and easy to use.
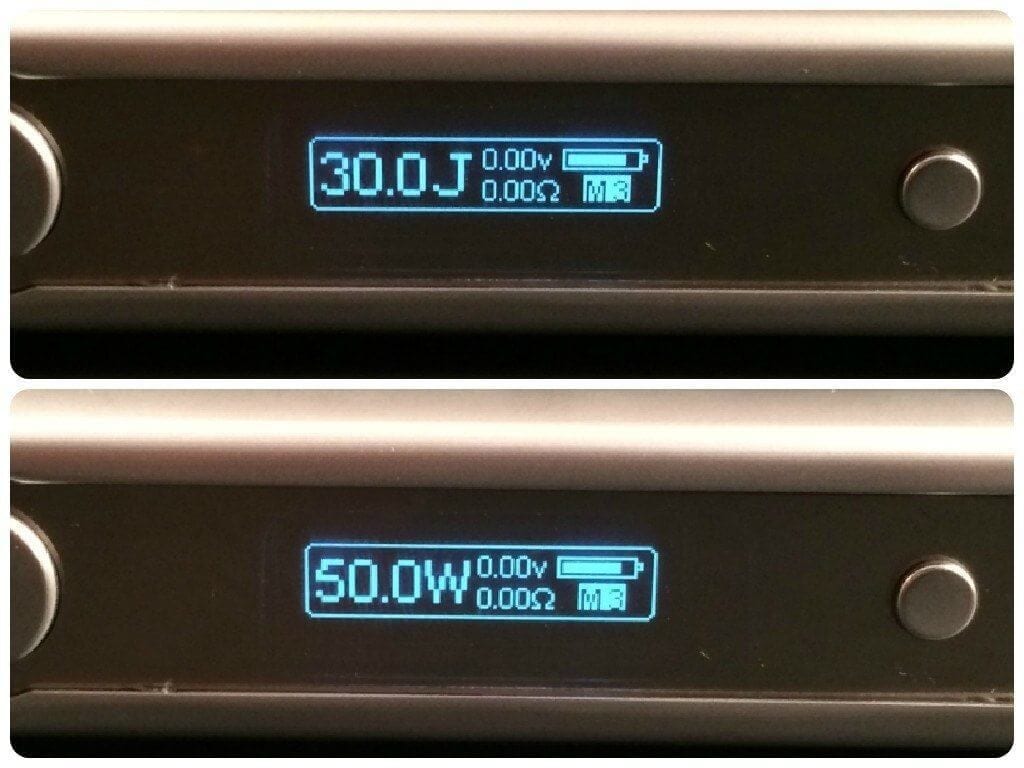
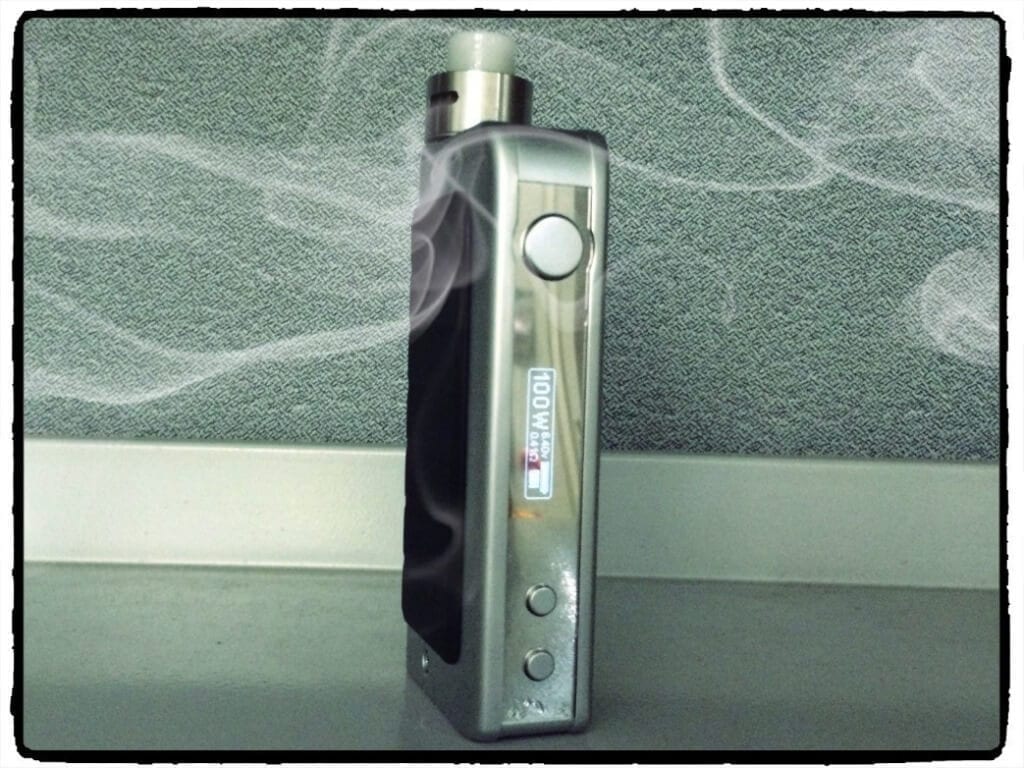
The screen layout is very simple and contains only the necessary data. The screen displays output voltage, atomizer resistance, battery charge level, the currently selected memory preset, and either the joules value or watts value depending on whether you are in joules (temperature protection) mode or power (variable wattage) mode.
While on the main screen, toggling between the five memory presets is accomplished by clicking the up button. Once the desired preset is reached, the value can be adjusted by first clicking the down button, then the up or down buttons as necessary to reach the desired value (joules or watts). The memory preset indicator on the screen will be replaced with an indicator reading “ADJ” to let you know you are in adjustment mode for that preset. Once the desired value is reached, press the fire button once to exit adjustment mode. Despite the published specs, wattage is adjustable from 10W-100W, not the 7W-100W as noted in the manual. Joules are adjustable from 10J-50J. Both watts and joules increment in tenths of a unit. Pressing and holding the up or down buttons will accelerate the adjustments.
While in Joules mode, pressing the up and down buttons simultaneously will lock the atomizer resistance value – a feature Evolv just coincidentally implemented in their temperature control boards.
I have experienced some random weirdness with the preset memory values. Between power cycles the Power mode presets would sometimes all default to either 50W or 24W. I had changed one of the presets to 24W previously so it appears the device was populating all presets with the last used value. Preset value changes are persistent through power cycles and battery changes. However, in Joules mode, they are not persistent if you select a different memory preset. For example, if I change M5 from 50J to 45J and power down the device, M5 will still be 45J when powered back on. But, if I simply change from M5 to M1, M5 defaults back to 50J. As far as I can tell, this behavior doesn’t exist in Power mode. But, both modes appear to have quirks. Whether this condition is unique to my unit or not, I’m not sure. I haven’t had the opportunity to explore the issue beyond testing for this review. While mildly inconvenient, I’m not losing a lot of sleep over it. Hopefully an update to the SX330 V4S firmware will address the problem.
Like many of the dual battery regulated box mods these days, the IPV4 mod uses two 18650 cells in a series configuration. So, the obligatory battery safety note…
Battery safety: always use a new pair of matched safe chemistry, high drain batteries with these devices. Dedicate the pair to the device, always use them together, always charge them together, and rotate their positions in the device at each battery swap. This process is often referred to as “marrying” the batteries and is the recommended practice to ensure optimal battery safety.
So, we covered the operational aspects of the IPV4. Now you probably want to know how it performs. Let’s take a look – I’ll cover temperature control mode first since that is arguably the defining feature of this device.
Joules Mode Performance (Temperature Control Mode – Nickel wire)
As has been noted, temperature control or temperature protection or temperature limiting, whichever nomenclature you prefer, is all the rage these days, and for good reason. I won’t rehash the merits and specifics of temperature control – by now, most everyone is familiar with the concept. If you aren’t, there is a plethora of reading material available on the topic. What I will discuss is how well temperature control has been implemented in the SX330 V4S board found inside the IPV4. For my temperature control testing I used my Origen V3 Dripper by Norbert – a fantastic atty to use with Ni200 wire due to it’s rock solid connections (a very important aspect of accurate temperature control). And, as a bonus, it looks pretty sweet on the IPV4.
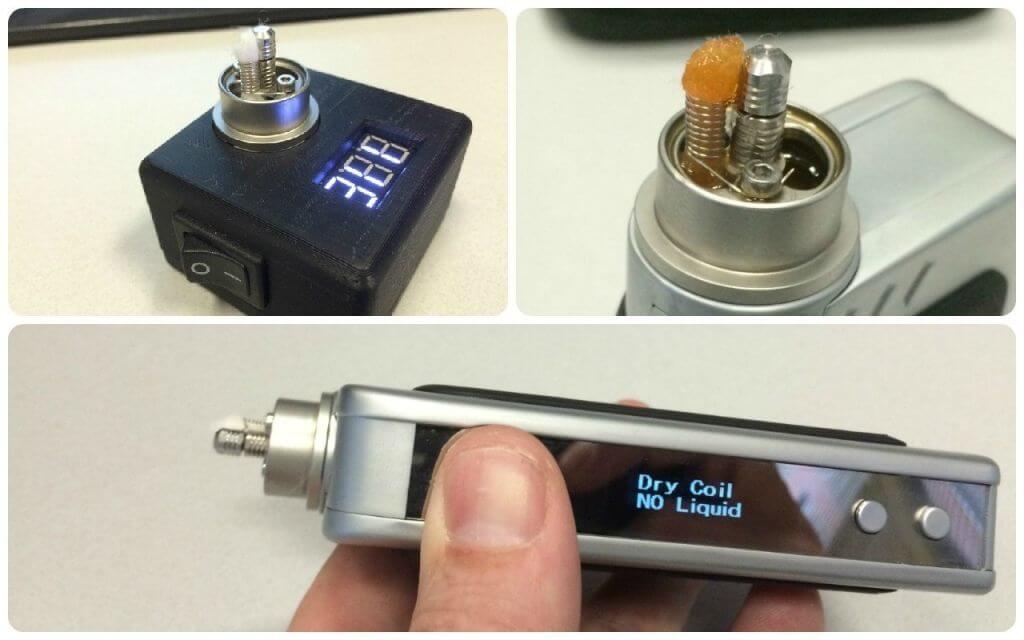
I decided to go single coil for this testing. Partly because, well, it was an easier and quicker build, and partly because I was shooting for a resistance that was just outside of what P4Y recommends (0.05Ω-0.10Ω). My build clocked in at 0.115Ω using 28AWG Ni200 annealed wire, 9 spaced wraps around a 3mm bit. As you can see below, firing the IPV4 with a dry wick worked exactly as intended. Temperature control kicks in immediately and prevents you from turning your wick into a small pile of ash.
In the several weeks I’ve had the IPV4, I’ve been using it almost exclusively in Joules mode. Quite simply, it just works. I previously owned an authentic Hana V4d with the Evolv DNA40 board and I’m here to tell you, I much prefer Yihi’s implementation of temperature control. Both boards achieve the desired result of protecting the user from dry hits, but I think the Yihi board is a better performer. While I don’t have any empirical data to support my opinion, I just feel like I get a much more consistent vape from the SX330 V4S. Even with a very solid nickel build, the Hana would, seemingly, randomly kick in temperature protection. I don’t have any thermal imaging gear to test actual temperature limiting but neither device ever produced a dry hit or burned a wick – I just like the vape better from the Yihi board. The IPV4 did its intended job very well as my atty ran dry of juice, gradually throttling back power to maintain the temperature limit without producing a gag inducing dry hit.
Since I am running a single coil in the Origen and it doesn’t flow a ton of air in this configuration, my preferred power level in Joules mode has been 20J-30J, depending on the juice. For me, this has been producing a super flavorful, cool to moderately warm vape. Not my usual cup of tea but the more I run this configuration, the more I like it… I mean really, really like it. I’ll likely go for a dual coil configuration in the near future which will double the airflow and allow me to bump the power up a bit. I’m guessing that will be awesome as well.
Again, I’m not an expert with temperature control devices having only used three to date: the IPV4, my old Hana V4d, and a Hana clone I reviewed previously (the Hana clone’s temperature control was pretty much a joke). But, I will say, I’ll likely look to Yihi for all my future temperature control devices.
Power Mode Performance (Variable Wattage Mode – Kanthal wire)
I’m not going to spend a lot of time on this mode since most folks are likely interested in the IPV4 for its temperature control features. But, in the interest of a complete review, I’ll cover some quick Power Mode ground. Yihi has been in the big power variable wattage (VW) game for some time now. So, it should come as no surprise that the IPV4 is an excellent performer as a VW device.
The IPV4 has 7.0V output limit, so if you wish to take advantage of all 100w of power, your atomizer resistance will need to be 0.49Ω or below. I covered figuring out the relationships between atomizer resistance, output voltage, battery current drain, and output current in my Sigelei 150 review – if you aren’t sure how those value affect each other, it may be worth reading. I also measured the accuracy of the Sigelei 150 in that review and discovered it is a bit under powered. How about the IPV4’s accuracy? Well, it’s a bit over powered! This thing is rowdy.
To test the actual voltage output of the IPV4, I spun a Derringer RDA built to 0.43Ω on to the device along with my inline voltage meter and fired away.
As you can see in the chart below, the IPV4 is pushing more power than indicated. While not exactly accurate, you certainly aren’t getting gypped out of any power. As always, adjust your power level to your desired taste, warmth, and vapor production and don’t sweat the actual number on the screen.
So, the IPV4 is a great temperature control device and an absolute beast in VW mode. I’m not sure I can find any significant faults with the performance of the IPV4. It works and it works well.
One final note on performance – as you would expect from a dual battery device, battery life is very good. Like the Sigelei 150, I didn’t benchmark run times but, hey, the batteries last a long time if you aren’t blasting 100W through it on the regular.
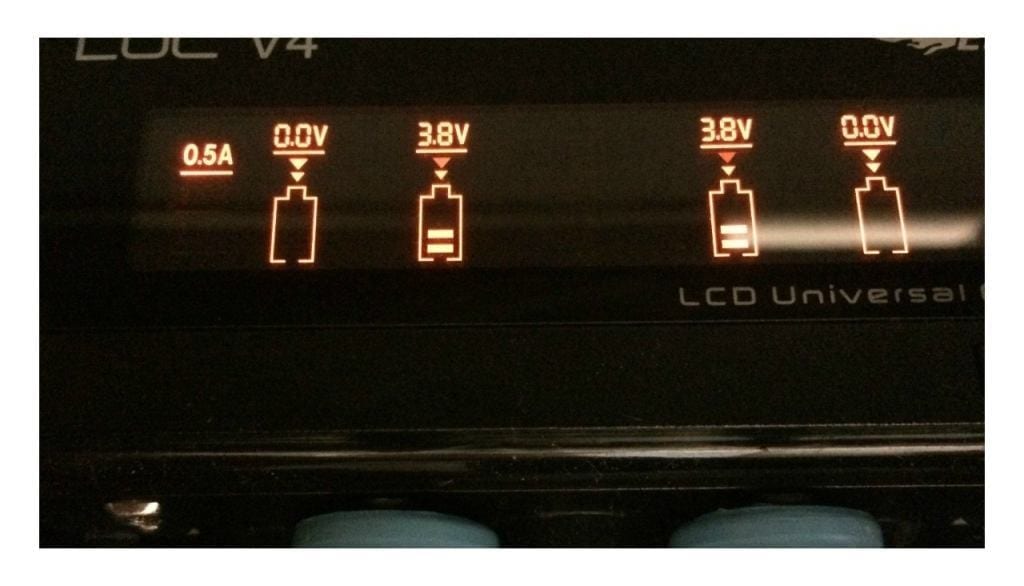
While I’m on the topic of batteries, I’ve read a few reports of users finding that their batteries are draining at substantially different rates – like to the tune of a full volt by the time the battery meter reads 1/2 full. I have not experienced this at all. With my unit, both batteries drain at nearly identical rates with 0.1V being the largest disparity I’ve seen. That’s well within an acceptable tolerance in my opinion. While writing this review, I pulled the batteries to illustrate:
Conclusion
Time to wrap this up, I guess. The Pioneer4You IPV4 is not without its faults, namely some strange memory preset behaviors and it is a little overpowered, but I’d consider this device one of the absolute best values on the market right now. Fully functional temperature control, monster power in VW mode, good build quality, and excellent price. The term “bang for your buck” certainly applies to the IPV4. P4Y is apparently attentive to customer feedback as evidenced by changing the screen overlay plate to a black finish rather than mirrored. Hopefully, P4Y will continue to refine the device and offer some fixes/enhancements via firmware upgrades. If you are looking to dip your toes into the waters of temperature control and don’t want to spend a lot of money, do yourself a favor and snag an IPV4.
PROS
CONS
[box type=”shadow” align=”aligncenter” width=”600″ ]
Where to buy the Pioneer4You IPV4
- Buy for $71.95 (coupon code: 10off) – Same version reviewed, Ships from USA.
- Buy for $74.99 – Ships from USA
[/box]



Not a quirk on your device, mine has the same presets issues. But as you suggest it is a minor irritation for an awesome device.
Hopefully, Yihi or P4Y will give us an updated firmware. I am still pretty stoked on the device, regardless. Thanks for your input!
The only negatives i read about from comments around the web about this device is regarding the mediocre build quality when comparing it to previous iPV offerings but for it’s price point (cheap) i agree it’s a great buy.
I found your mention below to be very unfortunate for everyone who doesn’t have this updated screen :
The OLED screen panel has a mirror finish which many users have complained about. The mirror finish renders the display difficult to read in brightly lit environments. However, P4Y IPV4 has recently changed to a black panel – the newest versions will have the black panel rather than the mirrored panel.
Murphy’s law i suppose , some people just have shit luck , it’s really just that simple. Anyways, great job on the review , well done.
Thanks Chris. I actually had the IPV4 out doing yard work today and the screen really is a bitch to see in sunlight. At least P4Y is listening to customers and revising the device… I give them props for that.
Very detailed and spot-on review of this device. I received my IPV4 on Monday of this week and have really enjoyed it so far. You get a lot of mod for the price point they are selling at.
Mine has the new screen cover, which makes it much easier to see the screen, Being new to temp control, it took me a couple of different nickel wire builds to get the vape I was looking for. I am now getting good flavor, vapor and a warm vape from the dual coil build that I have in an OverOne rda.
Thanks Billy. Did you have to file the ends of the screws on your OverOne? Mine cuts 24ga Kanthal so I imagine the screws would go right through nickel. Guess I need to knock the points off. What gauge wire are you using? Resistance? I’m guessing you can get pretty good sized nickel coils in the OverOne.
The screws on my two OverOne rda’s have not given me any problems with cutting wires. Maybe I was lucky in getting flat screws. My build is 30ga nickel twisted with 30ga kanthal and gives me a resistance of .1 ohm. The settings I run this build at is 40 joules and 360 degrees F(which should give me around 410 degrees F). Works good with no dry hits and will not burn the cotton. My coils are 3mm id.
Excellent review Shlanta! Hope to read more upcoming reviews from you.
I love that knock you made at Sigelei, while they do make great products, their box mod asthetics leave much to be desired.
As for the slotted 510 that really annoys me too, but I do have a theory as to why they do it. If it was perfectly flat and e-juice got inside somehow, having a flat surface may create a glue effect and by removing the atomizer you may pull out the 510 pin as well. You won’t pull it out if the 510 is slotted, but that’s just my 2 cents.
Keep up the good work!
Thanks Gary! Glad you enjoyed the review.
I’d love to see them stuff that SX300 V4 inside a IPV Mini chassis. 70w normal and 50j in Joules mode would be more than sufficient, and it’d be in a more manageable package. A budget SX Mini M Class.
The form factor would be nice but at the expense of dual batteries.
You really should check out the new innokin ITC. Has new “ALL WIRE” temp control. ALL WIRE!! IF this is true innokin will go straight to the front. They claim evolv and yhihi aren’t true temp control. Big talk. If this fails to deliver it gonna really hurt innokin’s credibility. Please find and report!!
Hopefully we’ll get one in for review. It sort of sounds too good to be true. And, while Innokin makes solid products, they don’t exactly get their stuff to market in a timely fashion. I’d be amazed to see this device this before 2016, lol.
Good review! I’ve had my iPV4 for a couple of weeks now. The only issue that I have with it (like many others have said), is the mirrored display. It’s fine in the house if it’s not too bright inside, but a PITA to see when you’re out in the sun/bright light. FIRES GREAT, batteries drain evenly, and are really nice & easy to change out. My mirror finish has “grown” a couple of black marks (that look like little scratches) on it. I don’t know how they got there, as I haven’t dropped it or had it rubbing against anything. The new BLACK screen will be a welcome improvement. The other issue that I see “possibly”, is that the grip/battery cover, MAY become loose or may not fit as securely as it does, as time and battery changes continue. I hope not, but we’ll see. All and all, for me, a great mod for around $70.00 !
Thanks Kevin. This thing is definitely a great deal.