Choosing the proper atomizer and coils for your e-cig, vape pen, or vape mod can be the difference between an awesome vaping experience and a not-so-great one. The use of vape replacement coils helps to ensure that your vaping apparatus provides you with maximum flavor and vapor so that you’re able to cloud chase to your heart’s content.
Every vaporizer coil is bound to go through some wear and tear eventually, so you may be seeking the answer to one very important question: exactly how long do atomizers last? The answer to this varies depending on how frequently you vape, but typically, the average lifespan of a coil is around two weeks (this can depend on a variety of aspects!).
When it’s time for it to be replaced, you’ll notice some leakage, a reduced production of vapor, and an unsatisfying burnt taste whenever you take a puff from your mod. But the easy part is knowing when to change your coils. Vape aficionados and newbies alike find actually participating in the vape coil replacement process to be a bit more challenging.
With all the different types of atomizers on the market, there’s no one true method of how to replace an atomizer that is better than any other, so it’s tough to know which replacement method to pick. To make this process as simple as possible, we’ve compiled a list of 5 easy ways to replace your atomizer/coil that will make your e-juice taste as good as new. So, are you ready to learn how to replace a coil? Let’s get to it!
A Brief Atomizer Breakdown
To start things off, let’s go through a quick refresher course. What is an atomizer? Vape fans usually have a basic understanding of the term and how it relates to them, but we’re going to break it down so that you can learn to change your coil like a true pro. In the simplest terms, the atomizer is the device that turns your e-liquid into smooth, savory vapor.
It is powered by your mod or pen’s battery, which heats up your coil and warms your e-juice so that the liquid reaches the optimum point of vaporization and allows your vape to do exactly what it’s meant to do. For vape wizards who prefer atomizers with some extra benefits, vape product creators have created two special types of atomizers: clearomizers and cartomizers.
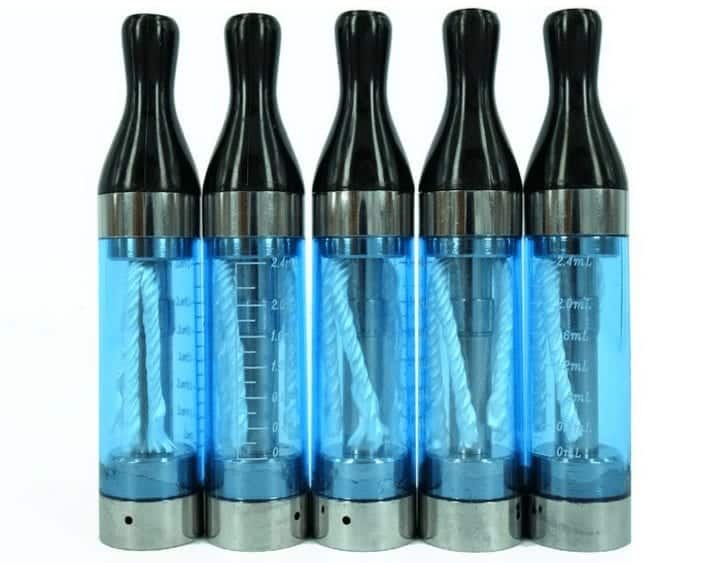
Clearomizers
The upside to using clearomizers is that they are completely see-through. This is great for people who like to know exactly how much juice is in their tank at all times; since the tank is transparent, you never have to worry about mistakenly using up all your vapor without knowing it and accidentally taking a dry pull off your mod. There are two types of clearomizers: top coil and bottom coil. Top coil clearomizers are filled from the top and result in warm, flavorful vapor.
Bottom coil clearomizers are a bit harder to fill since the juice can’t be inserted from the top, but are undoubtedly worth the extra effort: they provide a unique throat hit that provides cool vapor of the highest quality.
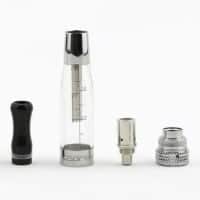
Cartomizers
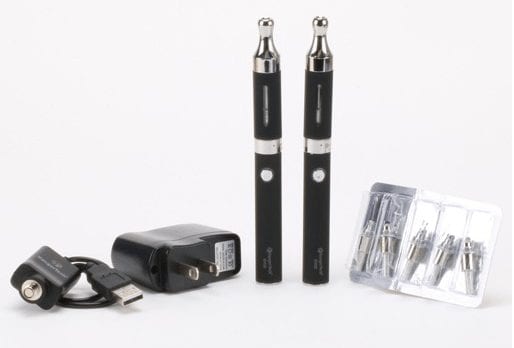
The other special type of atomizer is a cartomizer. Cartomizers are more likely to be found in older, more classic brands of e-cigarettes or vape pens. They come with the atomizer head already installed from the get-go, connect directly to the vape battery, and are incredibly low-cost. This means that the devices are literally disposable. Once your coil is burnt out, you simply throw away your old cartomizer, attach a new one, and continue to go about your day. How long do vape coils last in a cartomizer? Typically, between 1-2 weeks, depending on the frequency with which you use it.
Other Atomizer Variations
As if cartomizers and clearomizers weren’t enough, there are also a couple other different types of atomizers. Certain atomizers come with multiple coils. This allows heat to spread evenly throughout the atomizer, which results in cooler vapor with a stronger throat hit.
Some vape experts even choose to use RBAs, better known as rebuildable atomizers. To use an RBA, you must build your own coil (which means you will physically wrap the coil by hand), attach it to your atomizer, and insert your own wick for a one-of-a-kind vape experience.
The final type of atomizer is the sub-ohm tank. Sub-ohm tank atomizers use coils that provide less than 1 ohm of resistance. Most atomizers on the market have between 1.5-2.8 ohms, so those who use sub-ohm tanks receive the benefits of increased amounts of vapor, smoother, deeper throat hits, and warm, intense e-liquid flavor.
Now that we’ve refreshed your memory on what the different types of atomizers are and the benefits of using each one, let’s go through a breakdown of the 5 different methods for coil replacement.
1. Replacing Your Cartomizer
As aforementioned, most cartomizers are disposable, which makes replacing them very simple.
- Step One: Begin by removing the drip tip from your cartomizer.
- Step Two: Remove the cartomizer tank from your vape’s battery.
- Step Three: Pick up your replacement cartomizer and place it right side up.
- Step Four: Attach the tank onto your vape pen so that it latches on and locks in.
- Step Five: Discard your old cartomizer, and fill up your new tank with your e-liquid of choice.
Now that you know how to change out your cartomizer, you’re probably wondering how you should go about choosing the right one. When picking out a cartomizer, you want to be certain to get one that is cost-effective, fits your vape pen, and is compatible with your battery.
There are many different types of cartomizers: some come pre-filled with custom e-liquid, while others come empty so that you can fill them with the e-liquid of your choice. If you’re the type of person who prefers a vape pen with little to no maintenance, opt for a pre-filled cartomizer.
If you’re an e-liquid aficionado who would prefer to experiment with a variety of sweet, savory, and exceptionally flavorful e-juice options that vary from day to day depending on your mood, go for a cartomizer that you can fill with your own e-juice instead.
Looking for a specific cartomizer recommendation? Consider the Aspire CE5. It has dual bottom coils to keep your vapor cool and delectable, and gives off a vapor that is warm, smooth, and thick enough for grade-A cloud chasing. At the astonishingly low price of $3.85, this cartomizer is one that is tough to beat.
2. Replacing Your Multiple Coil Atomizer
Multiple coil atomizers are great for those seeking a lavish, extra-indulgent vape experience. Changing the coils for this type of atomizer is much like changing the coils for any other atomizer, except you’ll be changing multiple coils instead of just replacing one.
- Step One: Start with a clean tank. Make sure to empty out any remaining juice in your tank to keep the replacement process as clean and easy as possible.
- Step Two: Carefully remove the base of your atomizer by screwing it apart from the body.
- Step Three: Separate the atomizer head and base by twisting the two apart from one another. (Note: When using pre-built coils, you will always need to screw them into and out of the atomizer deck).
- Step Four: Attach the new atomizer, then reassemble your vape in the reverse order. Add your e-liquid of choice.
If you’re in search of a killer multiple coil atomizer, we’ve got a suggestion for you! Check out the Geekvape Ammit RTA Dual Coil Version. This is a rebuildable tank atomizer that contains a four path airflow apparatus for maximum vapor cooling, a deck that makes coil building simpler than ever, and comes in two colors—black and silver. This is a great atomizer for someone looking for an upgrade on their current vape experience.

3. Replacing Your Top Coil Clearomizer
Top coil clearomizers are perfect for vape wizards seeking a cloud chasing experience that provides warm, flavorful vapor and thick, vibrant clouds. Replacing a top coil clearomizer is quick and easy; once you learn the proper steps required to change out the coil, you’ll be able to perform the task in a flash.
- Step One: Begin by emptying out your tank. When disassembling a top coil clearomizer, the stem of the atomizer comes out along with the base and atomizer head, so starting with an empty tank ensures that you’re able to access the coil quickly and efficiently.
- Step Two: Next, unscrew the base and coil head. If done properly, the stem should come out along with them.
- Step Three: Screw your new coil into your mod, and re-attach the stem, head, and base in the reverse order in which you attached them.
- Step Four: Add your e-liquid of choice and enjoy!
If you’re in search of a stellar top coil clearomizer, we’d recommend Kanger’s T2. With a sleek design and plentiful airflow, this clearomizer is reliable, chic, and affordable.
4. Replacing Your Bottom Coil Clearomizer
Replacing a bottom coil clearomizer is much like replacing a top coil one, but with one extra benefit—you can do it without having to empty out your tank first.
- Step One: Invert your clearomizer so it is upside-down.
- Step Two: Unscrew your base and atomizer head from the bottom. The stem will remain intact inside your clearomizer.
- Step Three: Screw on your new coil, and reattach the base and head in the reverse order you took them apart.
One of the best bottom coil clearomizers on the market is the Kanger Evod 2. Its removable drip tip and easy-to-use single button system makes it a fantastic choice for newbies to the vaping game…not to mention the fact that it comes at a ridiculously low price that won’t break the bank.
5. Replacing Your Sub-Ohm Atomizer
Sub-ohm tank atomizers provide cloud chasing experts with the thick, cool vapor they crave and the freedom to have extra control over their clouds.
- Step One: Empty out your vape tank if necessary.
- Step Two: Unscrew the base from your tank.
- Step Three: Unscrew your coil, then separate the top portion of your tank so you can replace your coil.
- Step Four: Attach your new coil to your tank, then re-attach your atomizer parts in the reverse order you took them apart. To complete the process, add your e-juice and enjoy.
Sub-Ohm Tanks are some of the most popular atomizer options around, particularly for cloud chasers. Consider trying out the Geekvape Illusion Mini Sub Ohm Tank. It is made of glass and stainless steel, holds up to 3ml of liquid, has adjustable bottom airflow, and works with both large and small box mods due to its 25mm base diameter.

Know Your Stuff
Now that you’ve been briefed on the five different methods to replace your atomizer, let’s go over the specifics of when you should switch out your coil for a new one. Generally, the length of time in which you can use a coil with optimum results varies depending on how frequently you vape, and how high of a heat your coils reach.
The various types of e-juice you enjoy can also have an effect on your atomizer’s longevity. Super sweet dessert e-liquid flavors (as well as juices with more nicotine) tend to caramelize onto your coil more than a mild, savory juice flavor would, which means that if your e-juice of choice is incredibly sweet, chances are you’ll have to change out your coil a bit more frequently than you would otherwise.
For frequent vapers, you’ll most likely have to change your coil every week or so. Some extreme vape wizards even choose to change their coils daily for maximum flavor and vapor potential. Moderate vapers usually change their coils out every 2-2 and a half weeks, and infrequent vapers typically can manage to go three or four weeks before they need to conduct an atomizer replacement.
The world of vaping is one that is full of choices; from sub-ohm tanks to multiple coil atomizers, there’s an option out there that perfectly suits everyone’s taste. Now that you know everything you need to know about replacing an atomizer, go try it out! Trust us, your mod and your taste buds will thank you.