

Mage GTA By CoilArt Review
CoilArt is back again with a new atomizer in the MAGE family. Earlier in the year, CoilArt released the MAGE RTA to the market and it was received with open arms due to it’s remarkable performance and small form factor. The Chinese based company has now released a new follow up to the RTA, called the MAGE GTA. Jumping on the bandwagon of returning to single coil atomizers, which we have seen a fair bit of lately, CoilArt have offered their take on this for us enjoy. Thanks to CoilArt for providing the Mage GTA for review here on Vaping Cheap.
GTA stands for Genesis Tank Atomizer which are also lovingly referred to a Genny by those are familiar with their history. Although it’s not a traditional Genny in the true sense of the word, the principle for how it operates is very similar. A Genesis tank relies on having a long wick that feeds a coil that is close to the mouthpiece. This principal, of having the chamber as high as possible, has proven to give an enhanced flavor concentration due to close proximity.
[button color=”red” size=”big” link=”https://vapingcheap.com/likes/Gearbest/CoilArt-Mage-GTA-Review” ]Check Out the CoilArt Mage GTA Here! [/button]
Click Here to Check out the CoilArt Mage GTA!
What’s in the Box?
- 1x Mage GTA
- 1x Replacement Glass
- 1x Accessories Bag
Out of the Box
Again, a sterling effort from CoilArt on their packaging! As with every other product they have released the Mage GTA box is delightful. Opting this time for a box that slides out from an outer wrap – with a faux carbon fibre look on the packaging. On first inspection of the atomizer, it looks really nice and has a tight compact form factor. The nice lines and sleek aesthetics really shine on all of the CoilArt products and this one doesn’t disappoint either. This is one sexy looking tank!
The MAGE GTA holds a lot of resemblance to it’s brother the MAGE RTA, but appears to have a few more surprises in hand. Topping off the tank, there is a chuff style drip tip/top cap which can be interchanged with the RTA style if you prefer that. I know CoilArt sells these separately as spare parts in a few different colors. Underneath this, are the same kidney shaped fill holes and the chamber/chimney section is attached as one piece. The glass section is slightly bigger than the RTA, however it is held in by the same style of o-rings which are customizable in color with replacements in the spares bag. This means that glass tank is not able to be replaced with the MAGE RTA. The base shares the exact same airflow adjustment and three cyclops shaped air holes as the RTA.
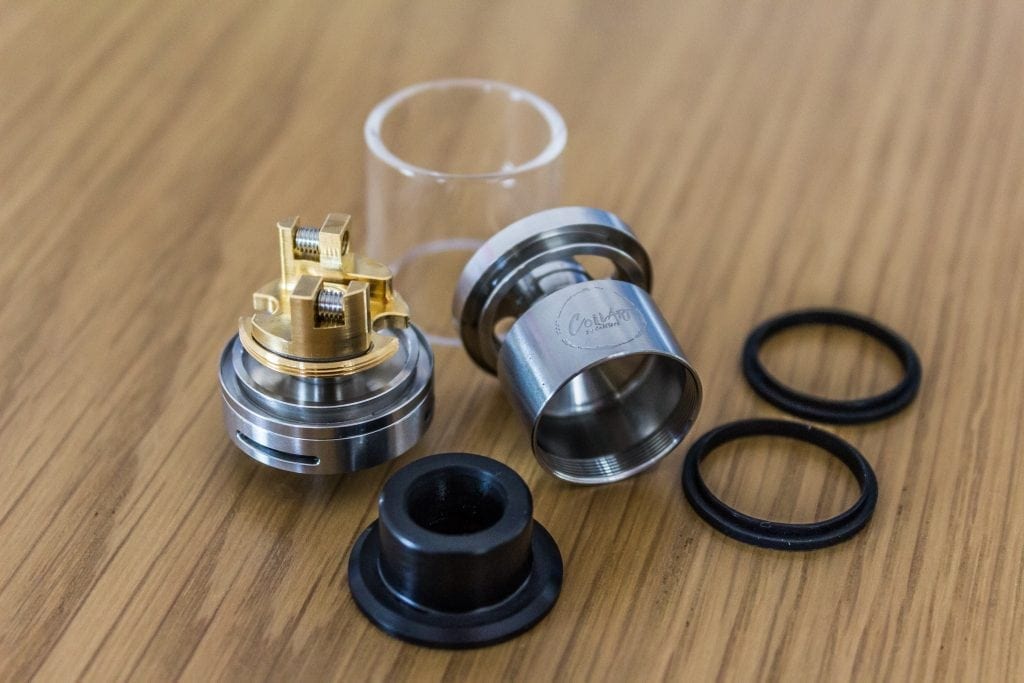
This brings us to the build deck and oh my what a pretty deck she is – plated with 24k gold. We see a similar deck design to the serpent mini, although here we have much more room to play with. This design is primarily aimed for single coil builds, however I am sure if you wanted to get creative you could come up with many options – there is certainly enough room to do so. Two offset post clamps are utilized with horizontal grub screws in between which the coils are secured. The grub screws are phillips head and can be adjusted with the included screw driver. There are wicking slots on either side that sit between the threads, which appear to be size-able enough to accommodate a fair amount of wicking material.
Finally on the bottom we see an adjustable 510 connection. This is the first adjustable 510 I’ve seen with a phillips head notch in it, which is a nice touch. It can be used with a traditional flat head screwdriver, however the phillips head will give more leverage whilst adjusting and less likely strip out. This 510 connection also happens protrude more than others I have seen to date.
The rest of the box contains a spare glass section, two sets of colored o-rings, some spare grub screws, a screwdriver, an instruction card and a vape band.
I was highly impressed with the build quality of this tank. All parts fit together nicely, there are not any loose threads or janky parts. The machining quality is top notch and I did not detect any reminiscence of machine oil on inspection.
Usage
Getting down to building, I found installing my coils a very simple straight forward task. Being a single coil tank, there was no battling with dual coils and having to get them perfectly positioned. It was simply a case of centering the coil over the large air hole and clamping each post down. For thinner coils, I would recommend ensuring that the coil ends are directly in the middle of the grub screw and the post to ensure a solid connection. For larger builds, I found that they still work fine if they sit below the grub screw as well as directly in the middle. Due to the huge amount of real estate available on the build deck, you can comfortably fit coils of up to 3.5mm diameter if you so choose to.
Wicking was again straight forward and very hard to get wrong. Once you feed your wick through the coil, you can train each end down through the wick slots to get an idea of where to trim it. I’ve had good results trimming the wick either just below the bottom of the wick slots or all the way down to the bottom of the reservoir. It’s best to experiment with this according to your coil build, wicking material and VG% of your e-liquid. When your happy with where you wick is sitting, make sure that it is tucked into the wicking slots clear of the thread to ensure that it doesn’t get caught up when you screw the top down.
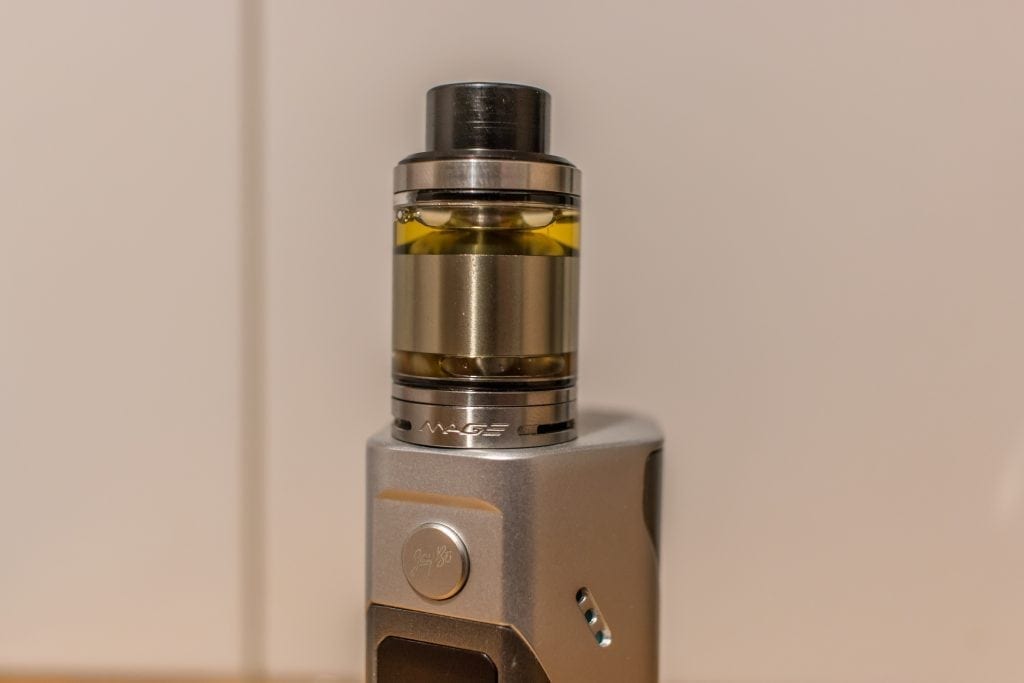
Filling the MAGE GTA through the top kidney shaped fill holes appears to be an easy task. It does require some attention though, as this is the part that has a few quirks to it. When filling, I recommend doing so slowly, as a quick injection of e-liquid may cause it to be forced up the wicking slots, through the air intake and out the air holes. So take your time and give it an even fill, while watching the juice settle in place. Due to the large chamber section, there is not much clearance to the glass and this causes air bubbles. You have to wait for the air bubbles to clear before you can fill the tank up fully. The air bubbles do come back during the course of normal vaping, but if monitored they do not affect the performance of this tank. More on this later.
The chuff like drip tip is very comfortable to use and the bore seems wide enough to compliment the airflow design of the tank. The pure shape of the drip tip makes it much easier to loosen than on the RTA, which was previously sloped and hard to get a grip of. You need to be careful when screwing in the topcap because the threads are cut into the delrin and could be easily striped. I recommend turning the cap anti-clock wise first to ensure that it is seated well in the thread before tightening further. You cannot use your own drip tip with this tank, your stuck with either the included topcap or you need to swap it out for the RTA top cap.
The airflow mechanism is super smooth to adjust and very easy to turn. It has just enough resistance to hold it’s place without being a pain to adjust. You can adjust it from fully closed to fully open and anywhere in between. Apart from stopping at either end, there are no stops in between like some attys where the airflow clicks into place. Due to the symmetry of the airflow design, each of the three airflow slots are mirrored all the way round.
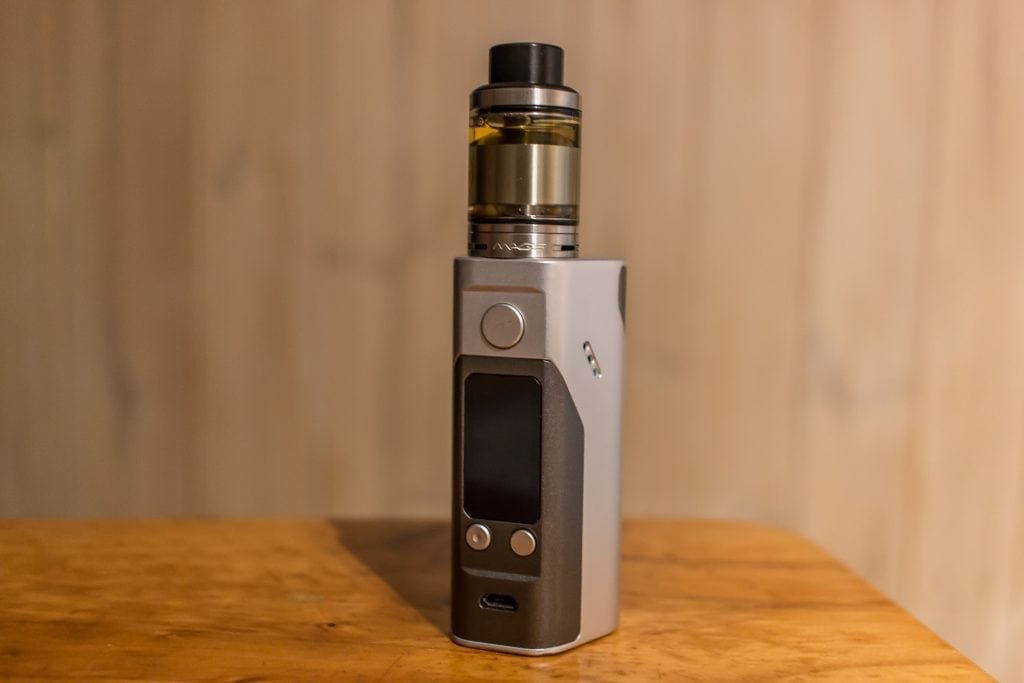
Despite the protruding 510 connection, the MAGE GTA fits well on each mod and makes a solid connection. I don’t get any gaps below the atty and every mod I have put it on looks neat. I have not had to adjust the 510 yet, so it seems to be set at the ideal length already.
Specifications:
- 24mm Diameter
- 47mm Overall Height
- 3.5ml E-liquid Capacity
- 24k Gold Plated Deck
- Convenient Top-Fill
- SUS304 Stainless Steel Construction
- Adjustable Airflow
- Food Grade Pyrex Glass
- Gold-Plated 510 Contact
- Black Delrin Drip TIp
[button color=”red” size=”big” link=”https://vapingcheap.com/likes/Gearbest/CoilArt-Mage-GTA-Review” ]Check Out the CoilArt Mage GTA Here! [/button]
Click Here to Check out the CoilArt Mage GTA!
Performance
The first build I tried in the MAGE GTA was a 3mm spaced 26AWG stainless 316L coil that came in around 0.7 ohms. With wide open airflow, the flavor and vapor production were pretty decent around 40 watts. With the airflow closed about a third of the way, the flavor started to increase. I was pretty impressed with the performance of such an easy straight forward coil build.
Then I stepped up to a fused Clapton, which came in about 0.45 ohms. I found the easiest way to install this was to have the ends of the coils vertical to enable a good connection with the post and grub screw, then reposition the coil in the center and quite close to the airflow. This is where the flavor and vapor production shined. Between 45-50 watts I was getting killer flavor again with about one third of the airflow closed and the clouds were good. I would almost compare the flavor to be on par with the MAGE RTA at this point. I think it all comes down to your coil build, amount of wick and the having the coil quite low and close to the air intake.
In comparison to the airflow on the MAGE RTA, I found the GTA to be a little more restrictive. By all means, not a tight draw, but less airy than the RTA none the less. I think this is probably a good thing as this tank can cater for Mouth to Lung style vapers where single coils really come into play.
I didn’t experience any leaking when using this tank, but do be careful as mentioned previously when filling to avoid over filling or quick entry of your e-juice. Wicking kept up well and I didn’t have any dry hits to complain about. Which brings me back to the point about having to monitor the air bubbles in this tank. As mentioned before, this tank is prone to air bubbles. The bubbles seem to occur under the chamber section and you can see the air pockets near the ends of your wick. Although, for me, the wicks stayed saturated – I do imagine for some people who vape heavily that this could cause an issue of e-liquid not saturating the wick, which would in turn lead to dry hits. The air bubbles do dissipate over time and can be quickly rectified by tipping the tank on it’s side. I would have to rate this as a con of the GTA due to it not being 100% hassle free vaping, you are always going to have to the fact that you need to monitor the tank in the back of your mind. I can personally deal with this, however it’s fair enough that others don’t have the time or need to have to worry about this.
As with the MAGE RTA, you cannot take your build deck apart to inspect it without loosing juice. So you have to either vape the tank dry or use a syringe to remove the liquid before disassembling the atty.
Personalizing the MAGE GTA couldn’t be easier. You have different color o-rings included and you can also swap the topcap out to the various color MAGE RTA topcaps for a perfect match. The MAGE GTA is available in both Stainless Steel and Black finishes and they both look great.
To summarize the Pros and Cons for this tank.
Cons
- You cannot use your own drip tip
- Top cap threading can strip if you’re not careful
- You don’t have the ability to inspect your build on the fly, need to empty the tank to rebuild
- Air bubbles on filling and vaping
Pros
- Amazing aesthetics and general looks
- Swap-ability with Mage RTA Top Cap
- Ability to run on a less powerful mod due to single coil
- Ease of use
If you are a single coil fan and wanted to try one of the CoilArt tanks, this would be hard walk past. CoilArt provide really good quality products for the price point, so you won’t be disappointed on either account. I don’t hesitate to recommend the MAGE GTA for it’s performance and flavor qualities.
Hopefully this article has helped you in your search for a new tank, feel free let us know your thoughts in the comments below.
[button color=”red” size=”big” link=”https://vapingcheap.com/likes/Gearbest/CoilArt-Mage-GTA-Review” ]Check Out the CoilArt Mage GTA Here! [/button]